I have allready long time wanted to change into DD wheel and you could consider my quite hardcore simracer when we talk of amount of hours what i put for simulator (which unfortunately do not reflect to results but well i enjoy it anyway)
I also have done quite a lot of DIY building: wheels, button boxes etc and decited to go on with OSW Simcube 1 building project dispite the fact that Mika said to get commercial solution. But well i like tinkering and building things and hope that going with Simcube 1 with DIY wont be wrong selection.
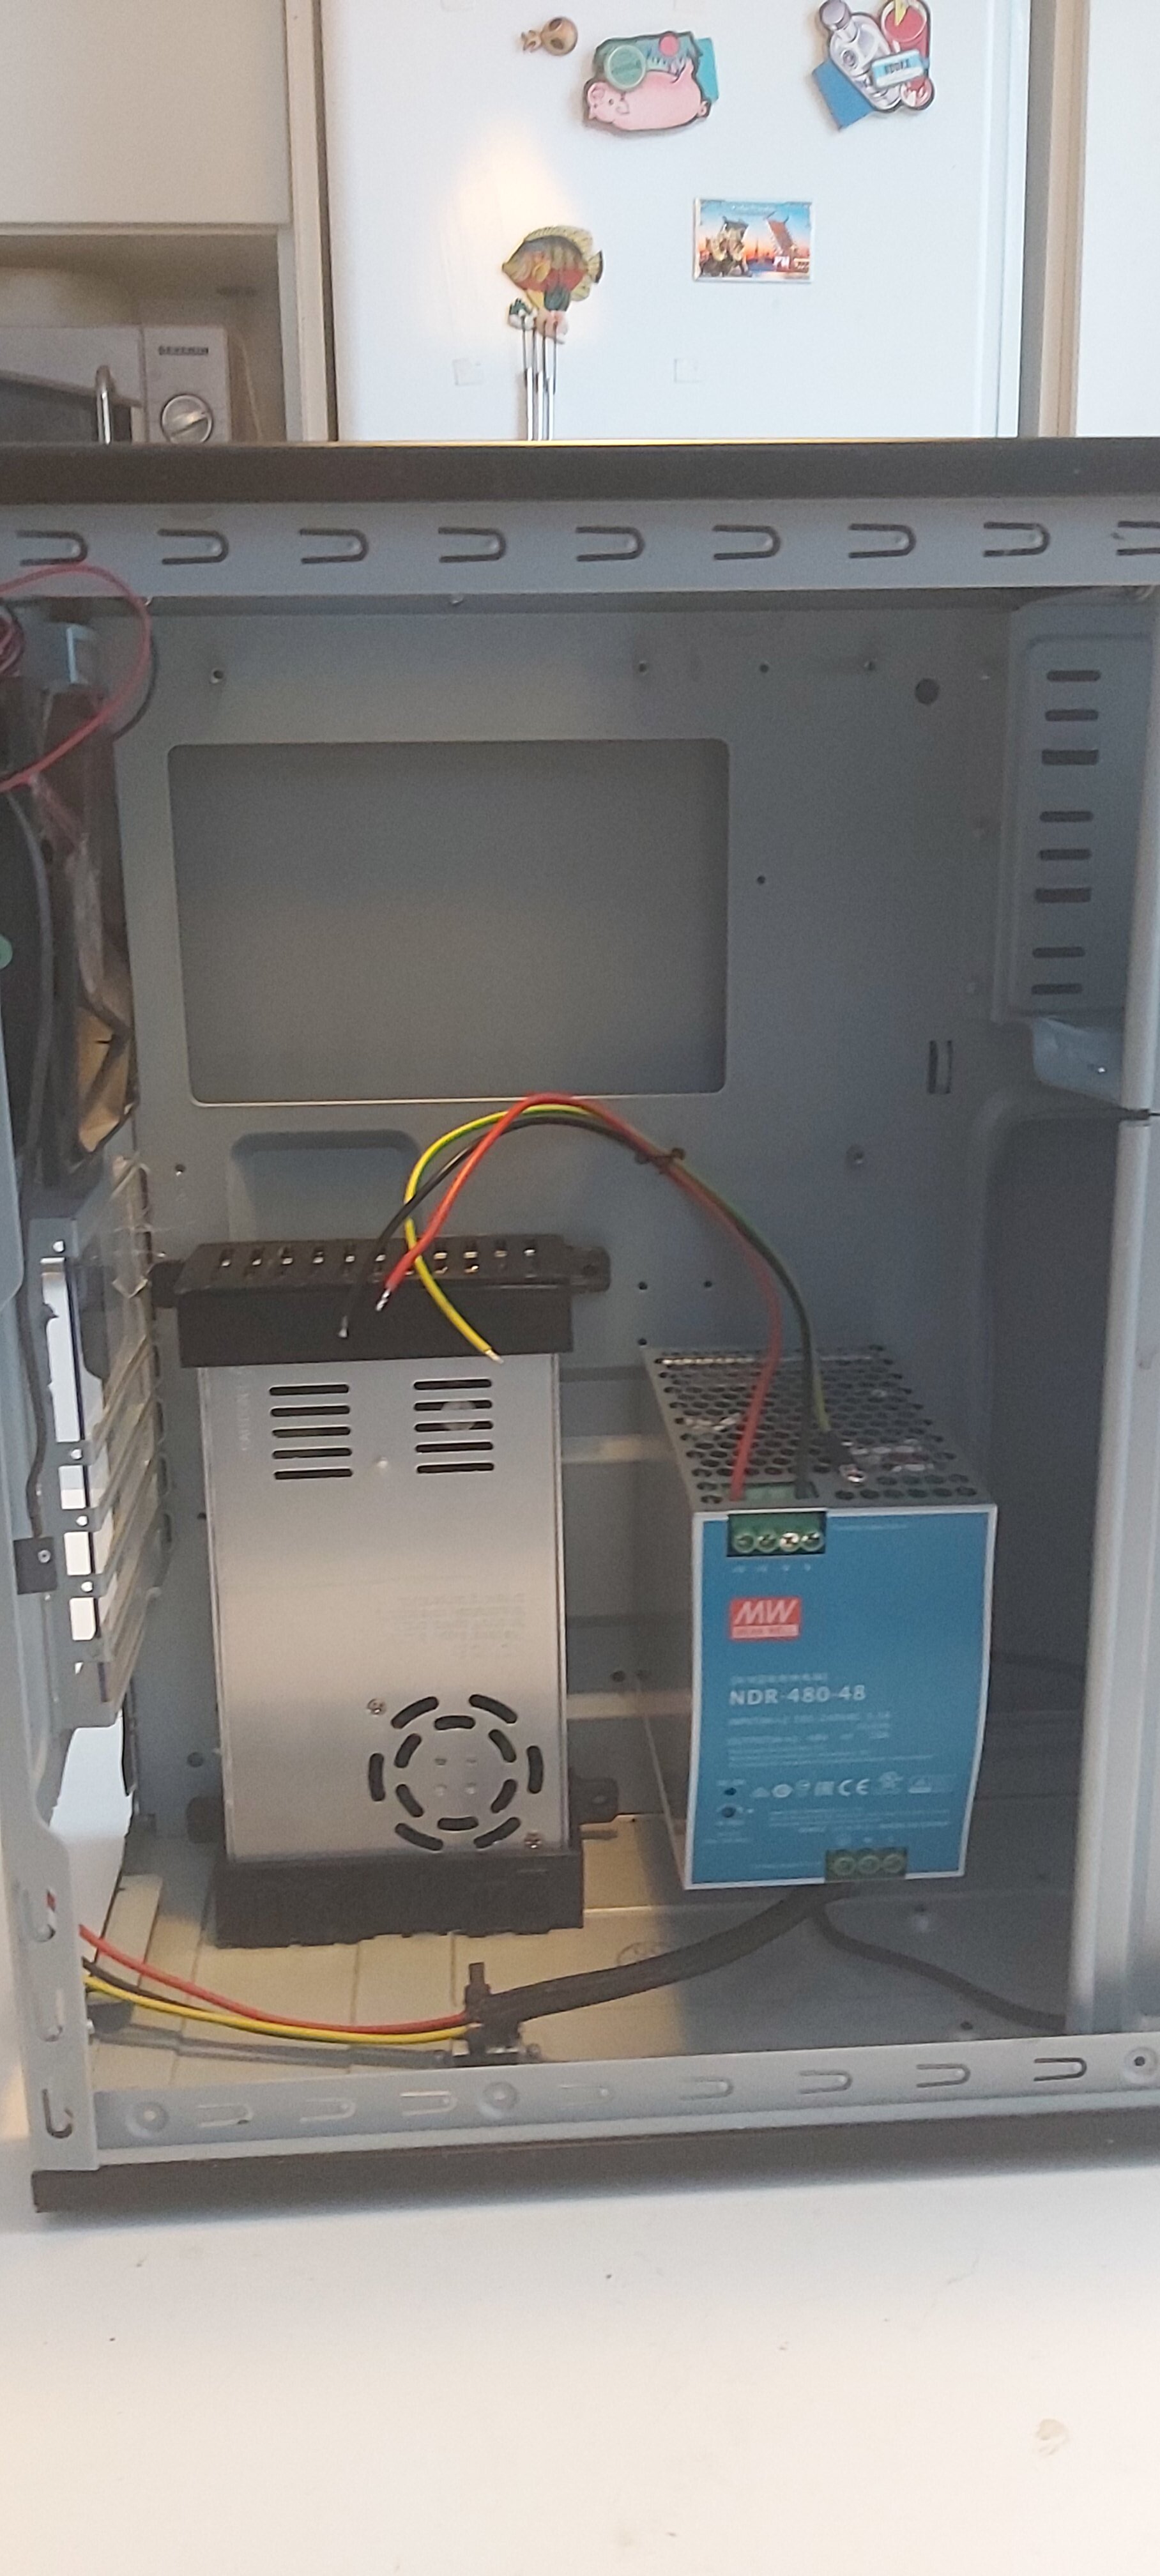
I am now building setup to old ATX case where i have put NDR480 PSU and Mige has arrived with cables from China this week. I have also some packages waiting delivery in post so i hope some of the things what i have ordered for build are there also.
I have been also thinking if i would put seat belt tensionar PSU to same case with Arduino control board with separate power feed but i am thinking would that create ground loop or some other issues in case. I will probably find out that later.
I am working in a company which is building devices which communicate in Low Voltage Electricity network and in my previous task in Customer Projects one part of our delivery project was to find out devices which are creating interferance to PLC network in certain frequency range which will block communication from devices. Typical example in your own home would be like example that lights or touch activing household devices like example ovens are not working correctly. Turning on or off etc. My interest is what frequency spectrum looks like when Mige is running and active. Is there interferance in certain frequency ranges what Mige creates. I try to have our analyse tools borrowed from work and make measurements after build is ready and then also if there is some frequnzy found i try some common 1-phase filters what we normally use to filter out malfuctioning PSU’s, LED lights, frequency converters etc.
Keep thumbs up and feel free to comment, ask or provide feedback or your own experiences. I will post some pictures also soon.
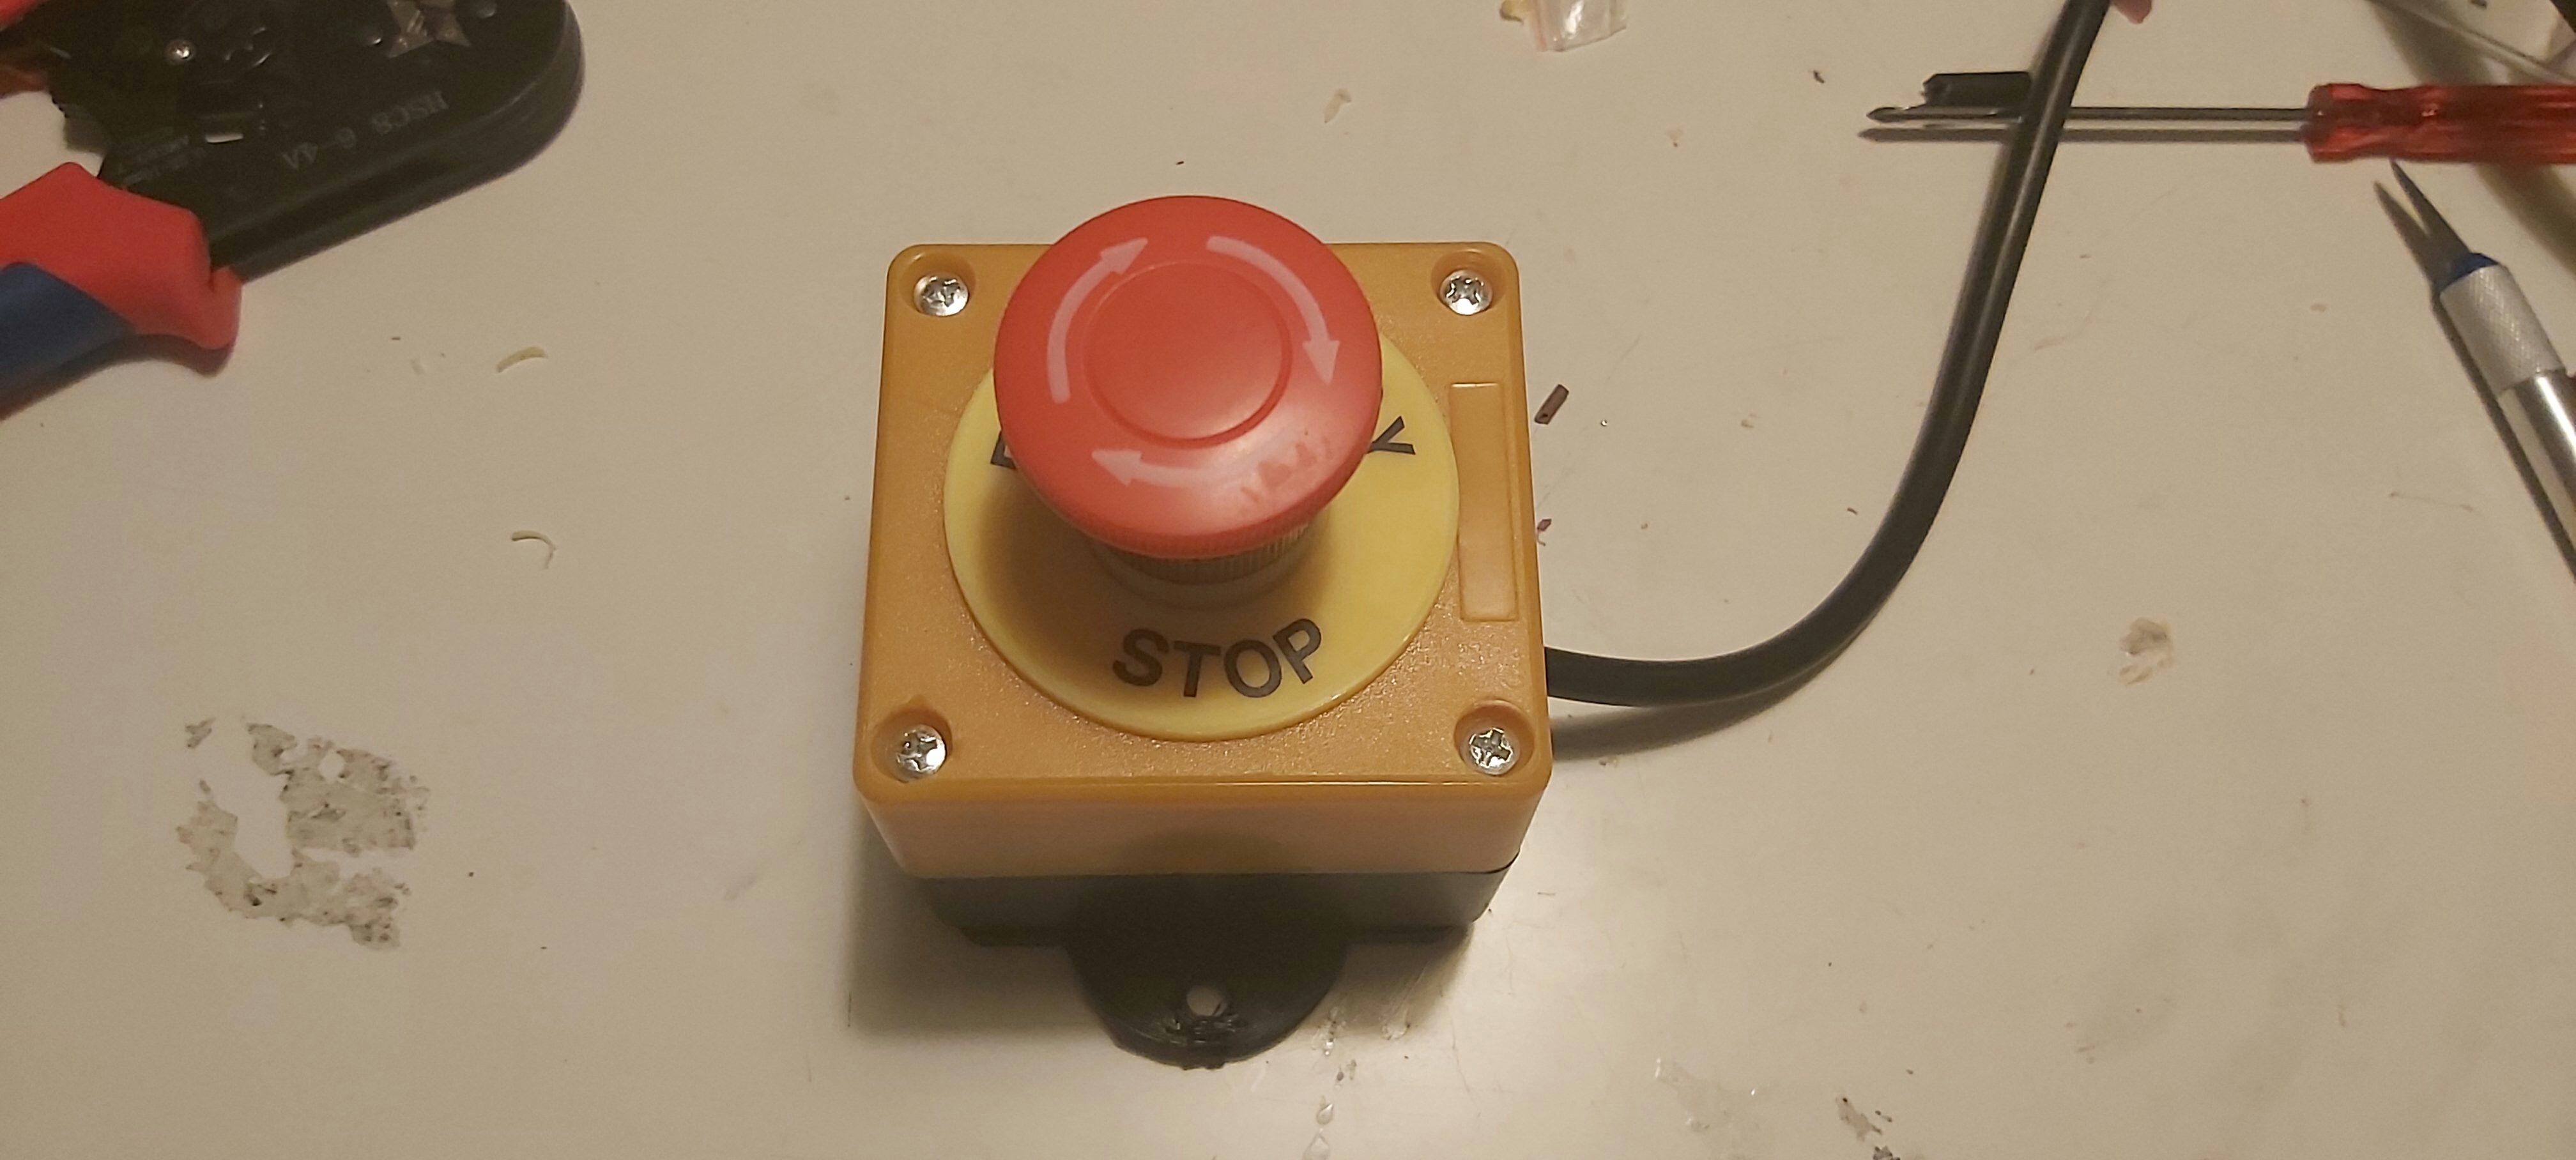
As i wait few parts to arrive from China and most importantly my payday to buy some more missing parts i wired emergy stop button which arrived suprise suprise from China.
I also purchased cheap ferrulite connector crimps and did proper connectors for all wires. We would have in our office lot of those available but during COVID time i was too lazy as i have been working from homeoffice almost year that i instead purchased cheap Chinese one with box of connectors. They can be also used in other projects for making connector.
As i have studied different wiring guides and browsing lot of people build blogs of OSW build i have noticed that there is external display interface in Simcube board. I have one Nextion 4.3 display what i could use for that. But is there any functionalities done in Simucube 1 for display?
I can just guess it could maybe offer same interface to change settings what you can do via PC but i think it would be easier to use via PC expecially for older guy like me
Maybe i should just use that display for some other project…
There is indeed lots of expansion connectors on Simucube 1, as the board was originally designed to be a no-compromises platform for some OEM to build up on. However that never materialized and the opensource development is also very dead, so no functionalities were ever implemented.
Bottom Split Podium https://www.youtube.com/watch?v=WDnL4BCMagU&t=971s in his own video gave a good instruction how late Windows 10 version owners need to probably install from Program Files (x86)\STMicroelectronics folder dpinst_amd64 application to enable Simucube visibile in Windows 10 computers.
I downloaded softwares and i am making installation guide list to google sheet. Few things what i am thinking about after reading information from different places including WIKi guide of firmware update.
In Youtube guide it is saying that first Ioniboard is updated and after you need to install
v0.11.2 and then you update SimuCube BISS-C 22 Bit.drc with that Simucube v0.11.2. I can also see in red written note in 2019 firmware 0.50.4 / 0.50.4 "It is recommended to set up Simucube 1 with version 0.11.2 first, and then upgrade to this version. There are some bugs in this version that might prevent successful install from scratch… "
Is this instruction still valid with latest firmware Simucube_fw_1.0.30 version and it is recommended first to install v0.11.2 and then update it to 1.0.30 after BISS C encoder driver is installed?
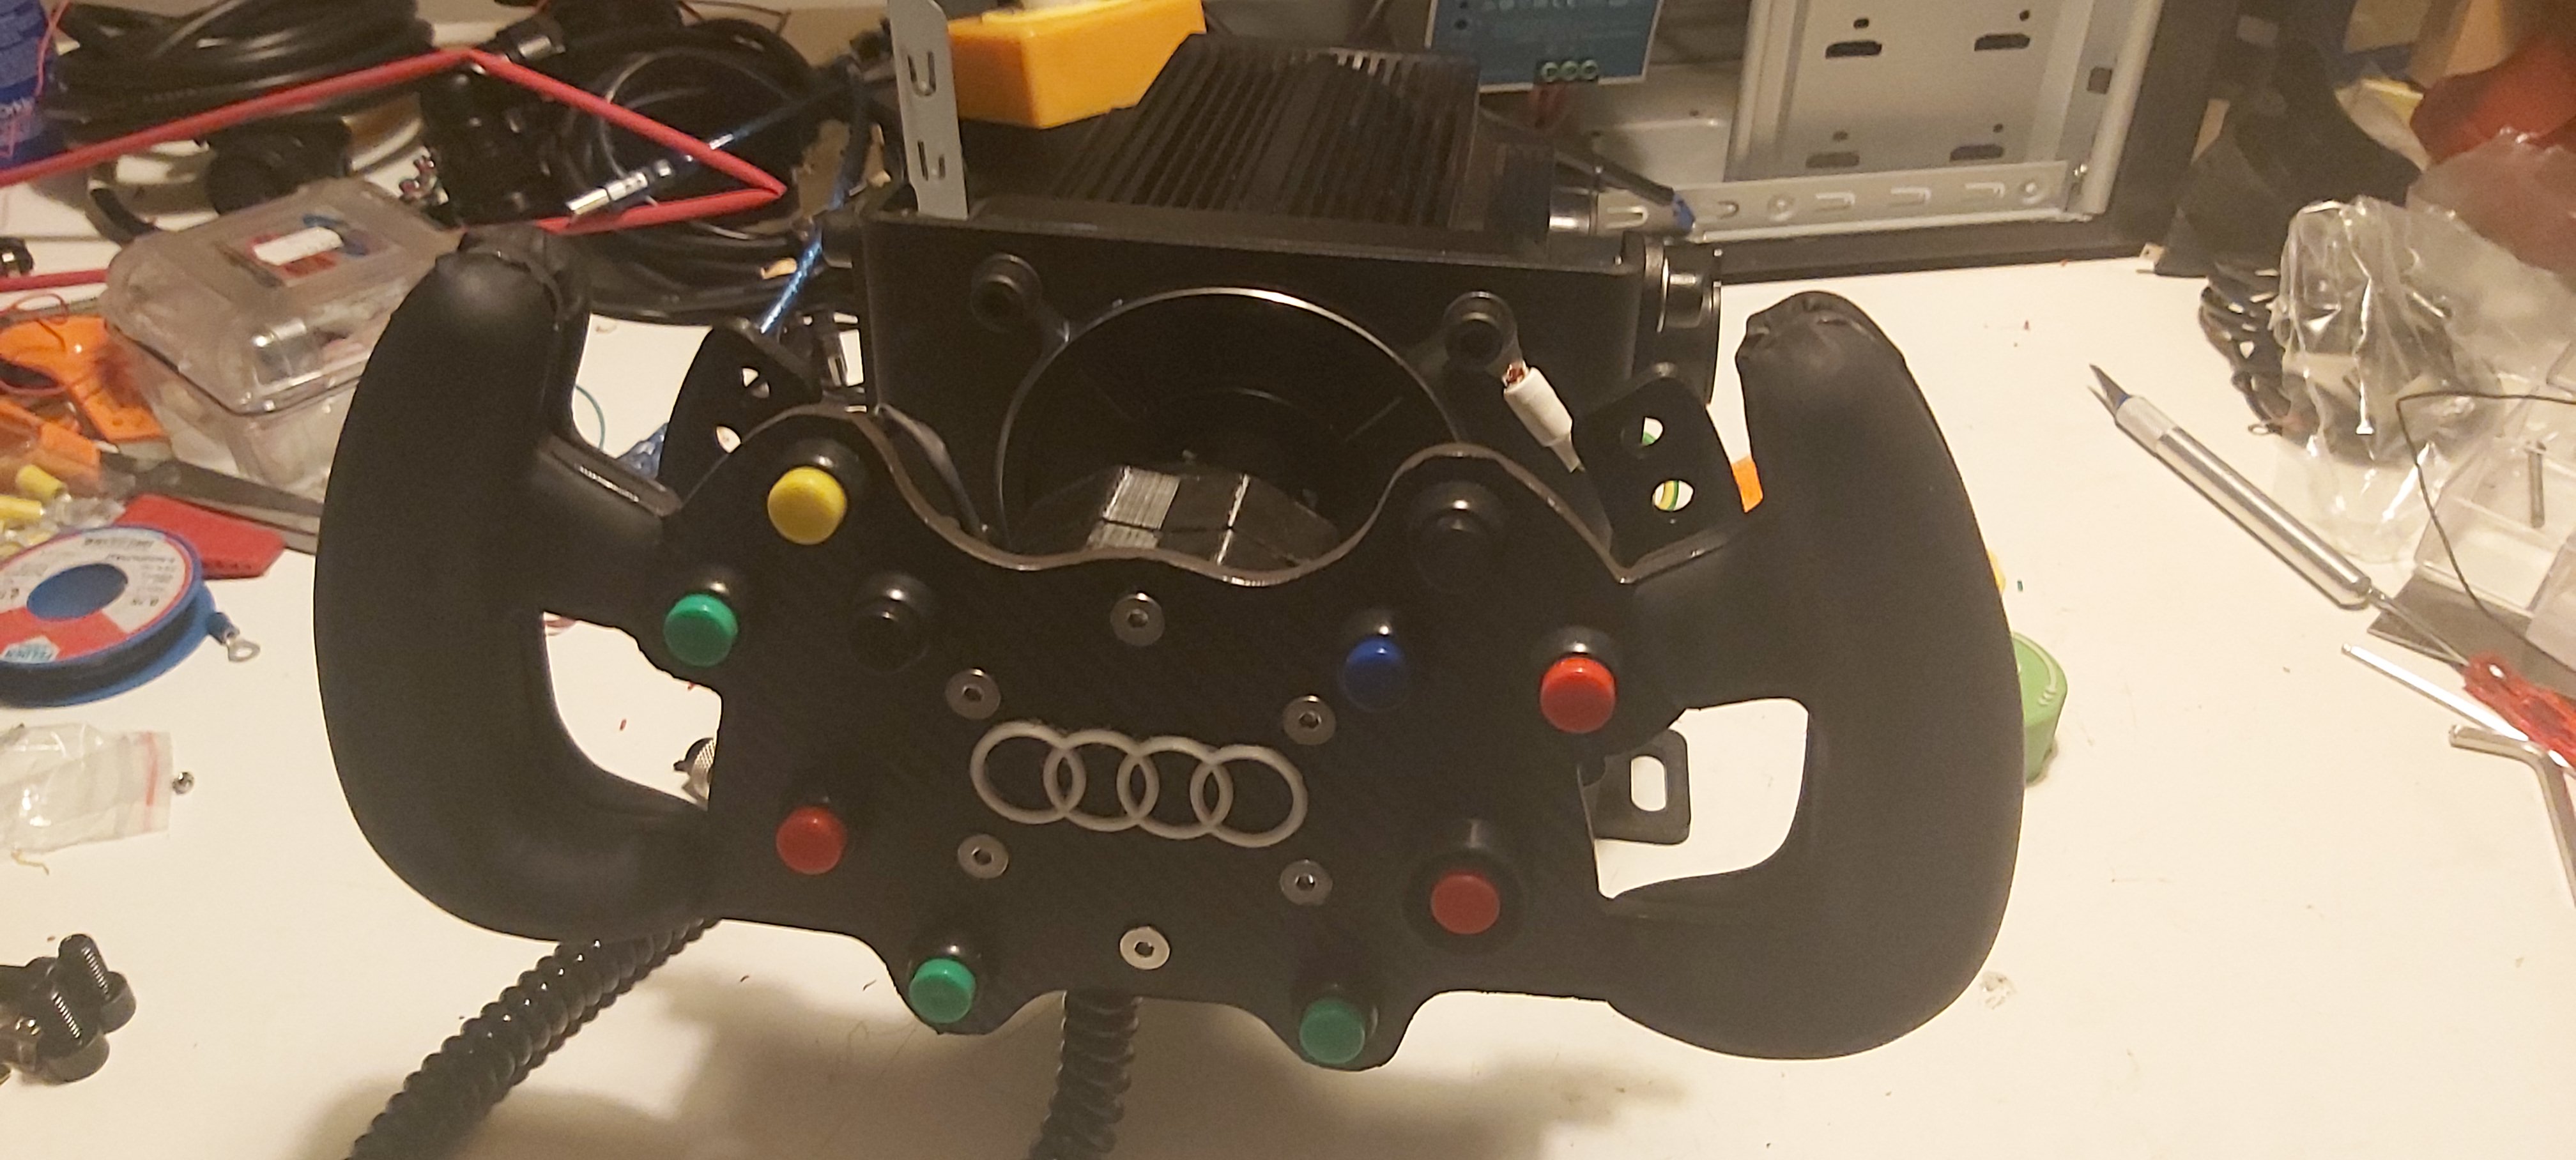
I bought few things from finnish E-Sport RSH company Huippurigit ja simulaattorituotteet | RSH E-Sport Company (e-sport.company). Very good and fast delivery. I ordered itemds friday and i could pick them up from post package service today). “axel clamp” i do not know better word for it which will be also is now temporarily my QR to Audi wheel and Direct Drive wheel mount and attached them.
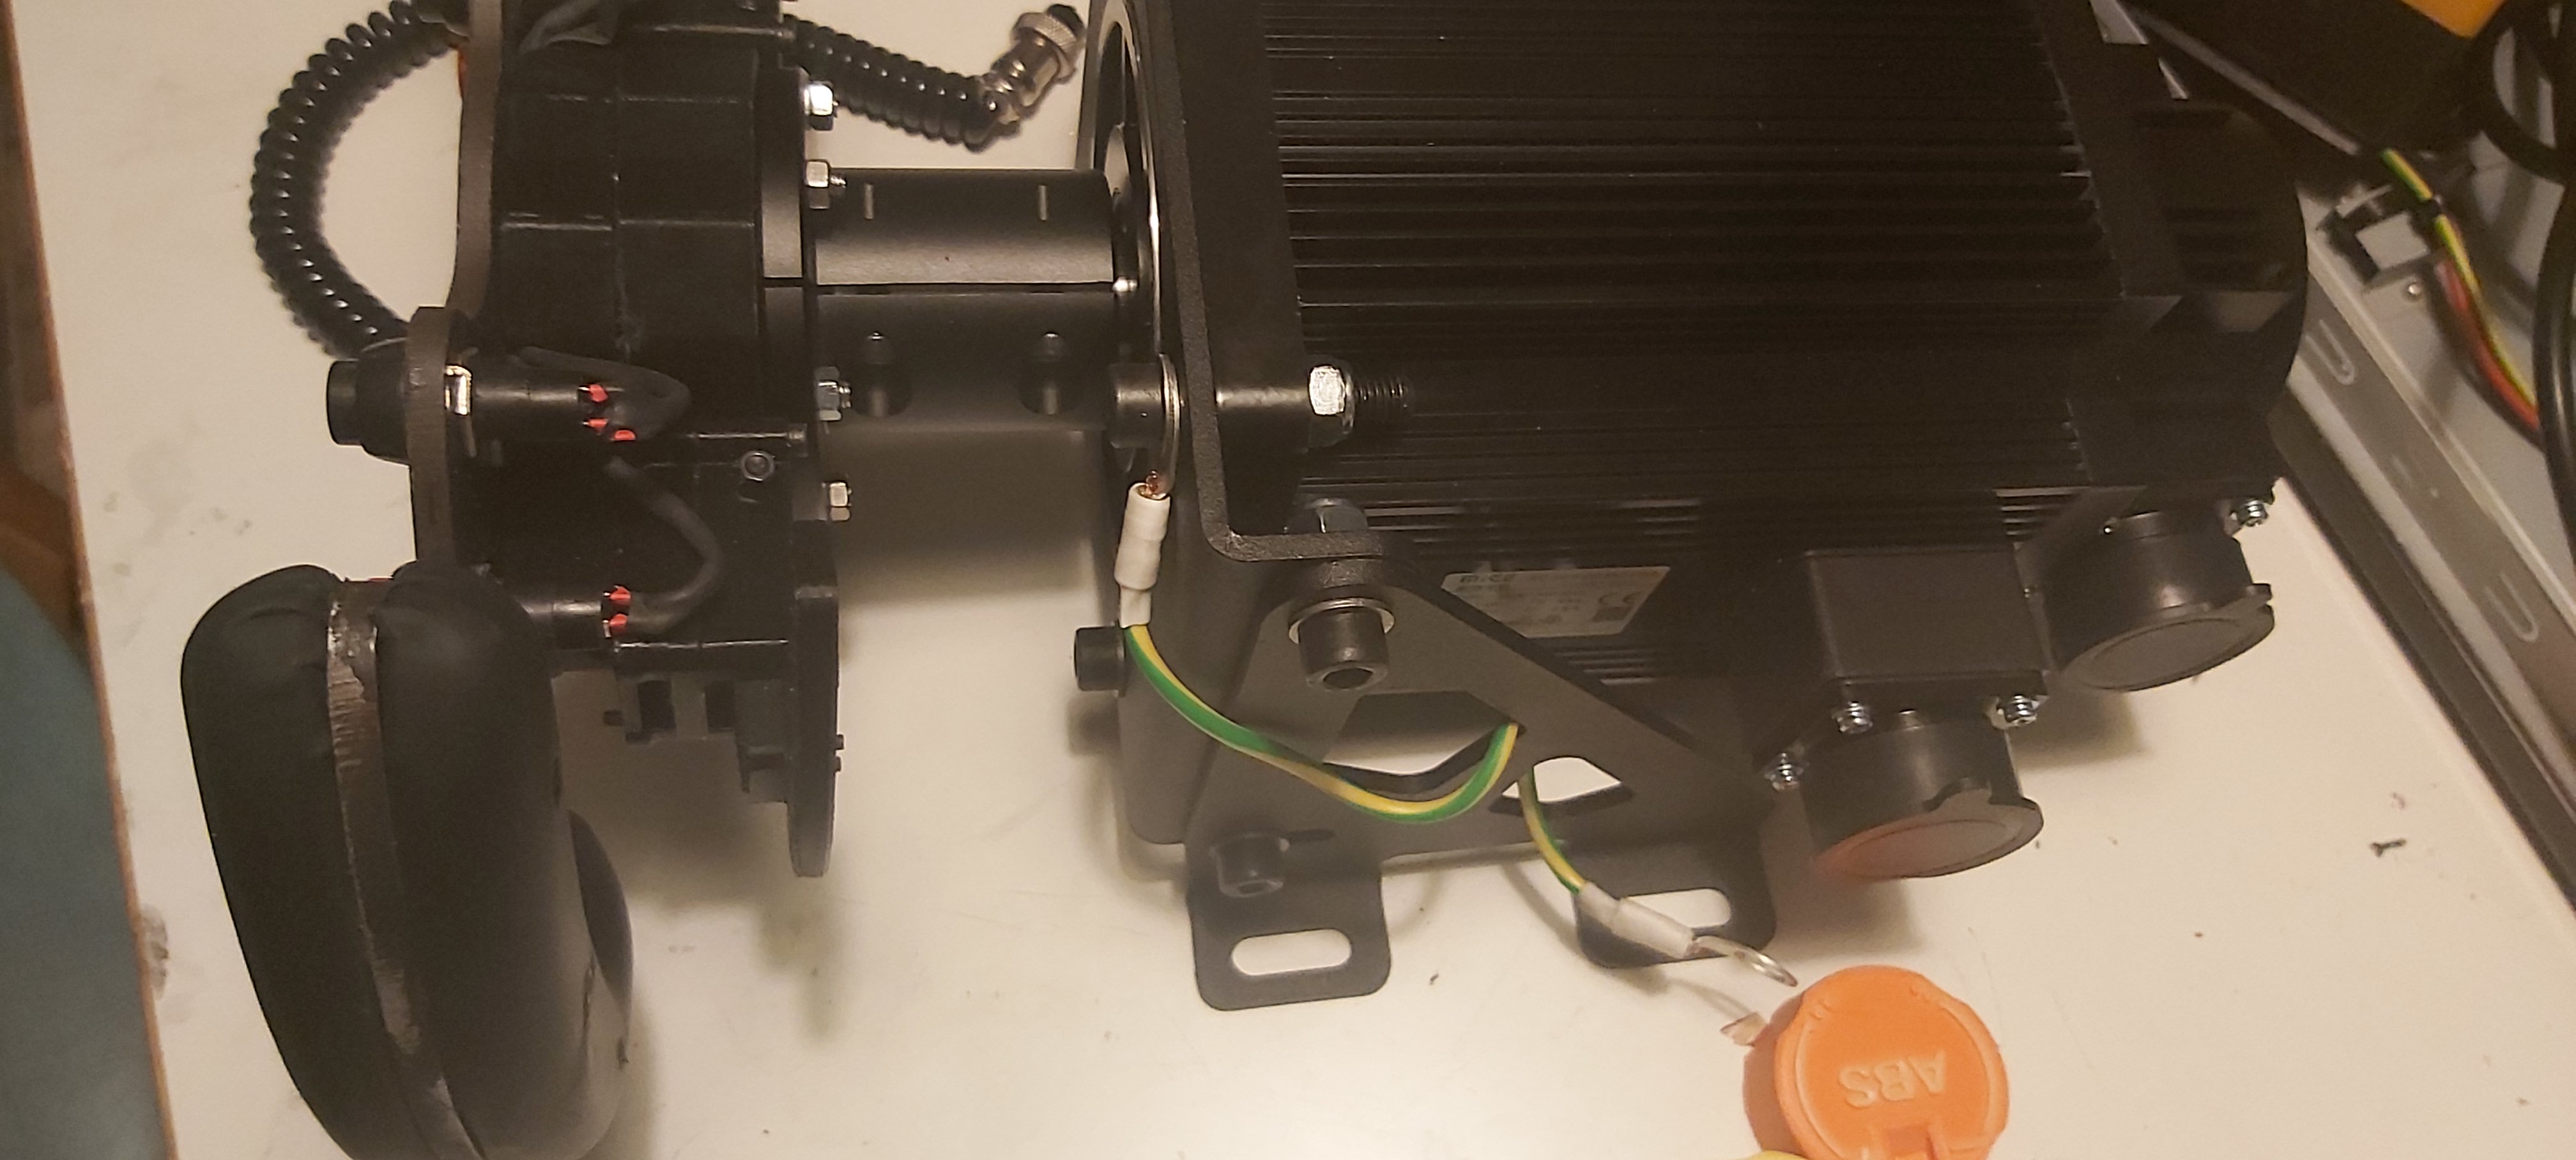
I also started to build grounding wiring taking one ground wire from attachment bolt securing Mige and other end attached to bold which secures mount to rig where i have grounding point. and from there i also take wire to PC case.
I also took from USB card (Generic USB Joystic card) inside wheel ground from USB connection and wired to one QR bolts.
Now just waiting DHL to deliver Simucube and Ioni Pro cards so that i can finish wiring and start to work with firmware and software updates.
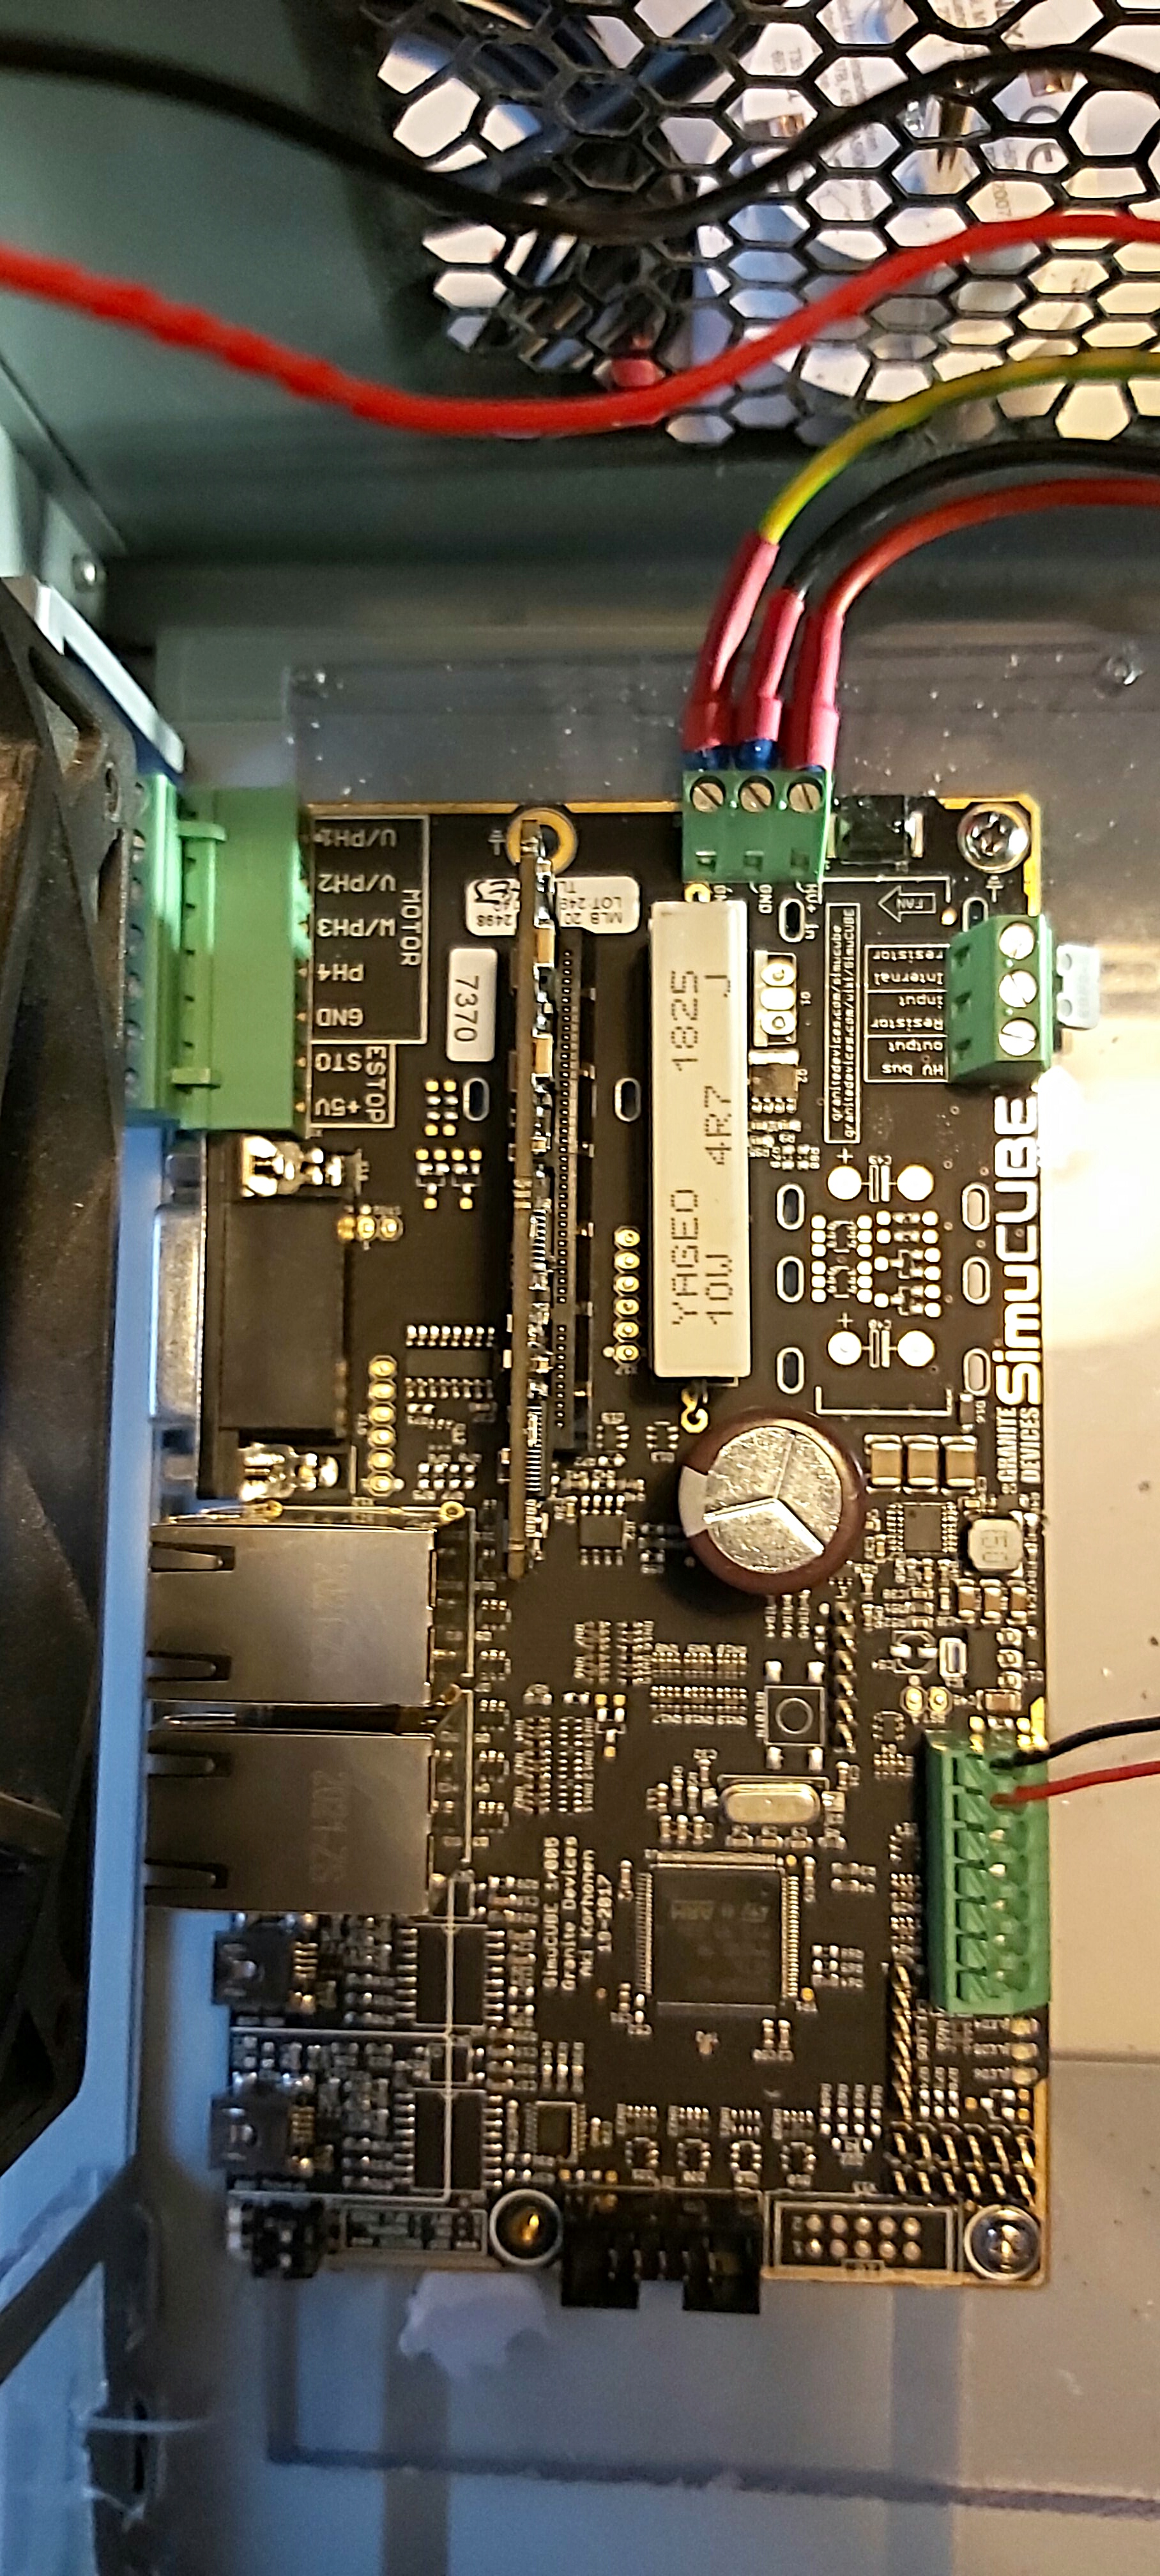
DHL delivered Simucube board and Ioni Pro and i finished attachment and wiring to card. I also moved PSU place little bit and drilled through case holes securing it with bolts to wall of case.
Before cards arrived i tested PSU and it seems that green LED was lit when i powered it. Now it is time to have coffee and lunch. Check photos and connections few times to make sure there is no error and then start to update software.
Something is not correct in PSU. First time when i powered system it shut down electricity. Fault circuit protection witch in electricity cabinet and i you could also heard small noise from PSU.
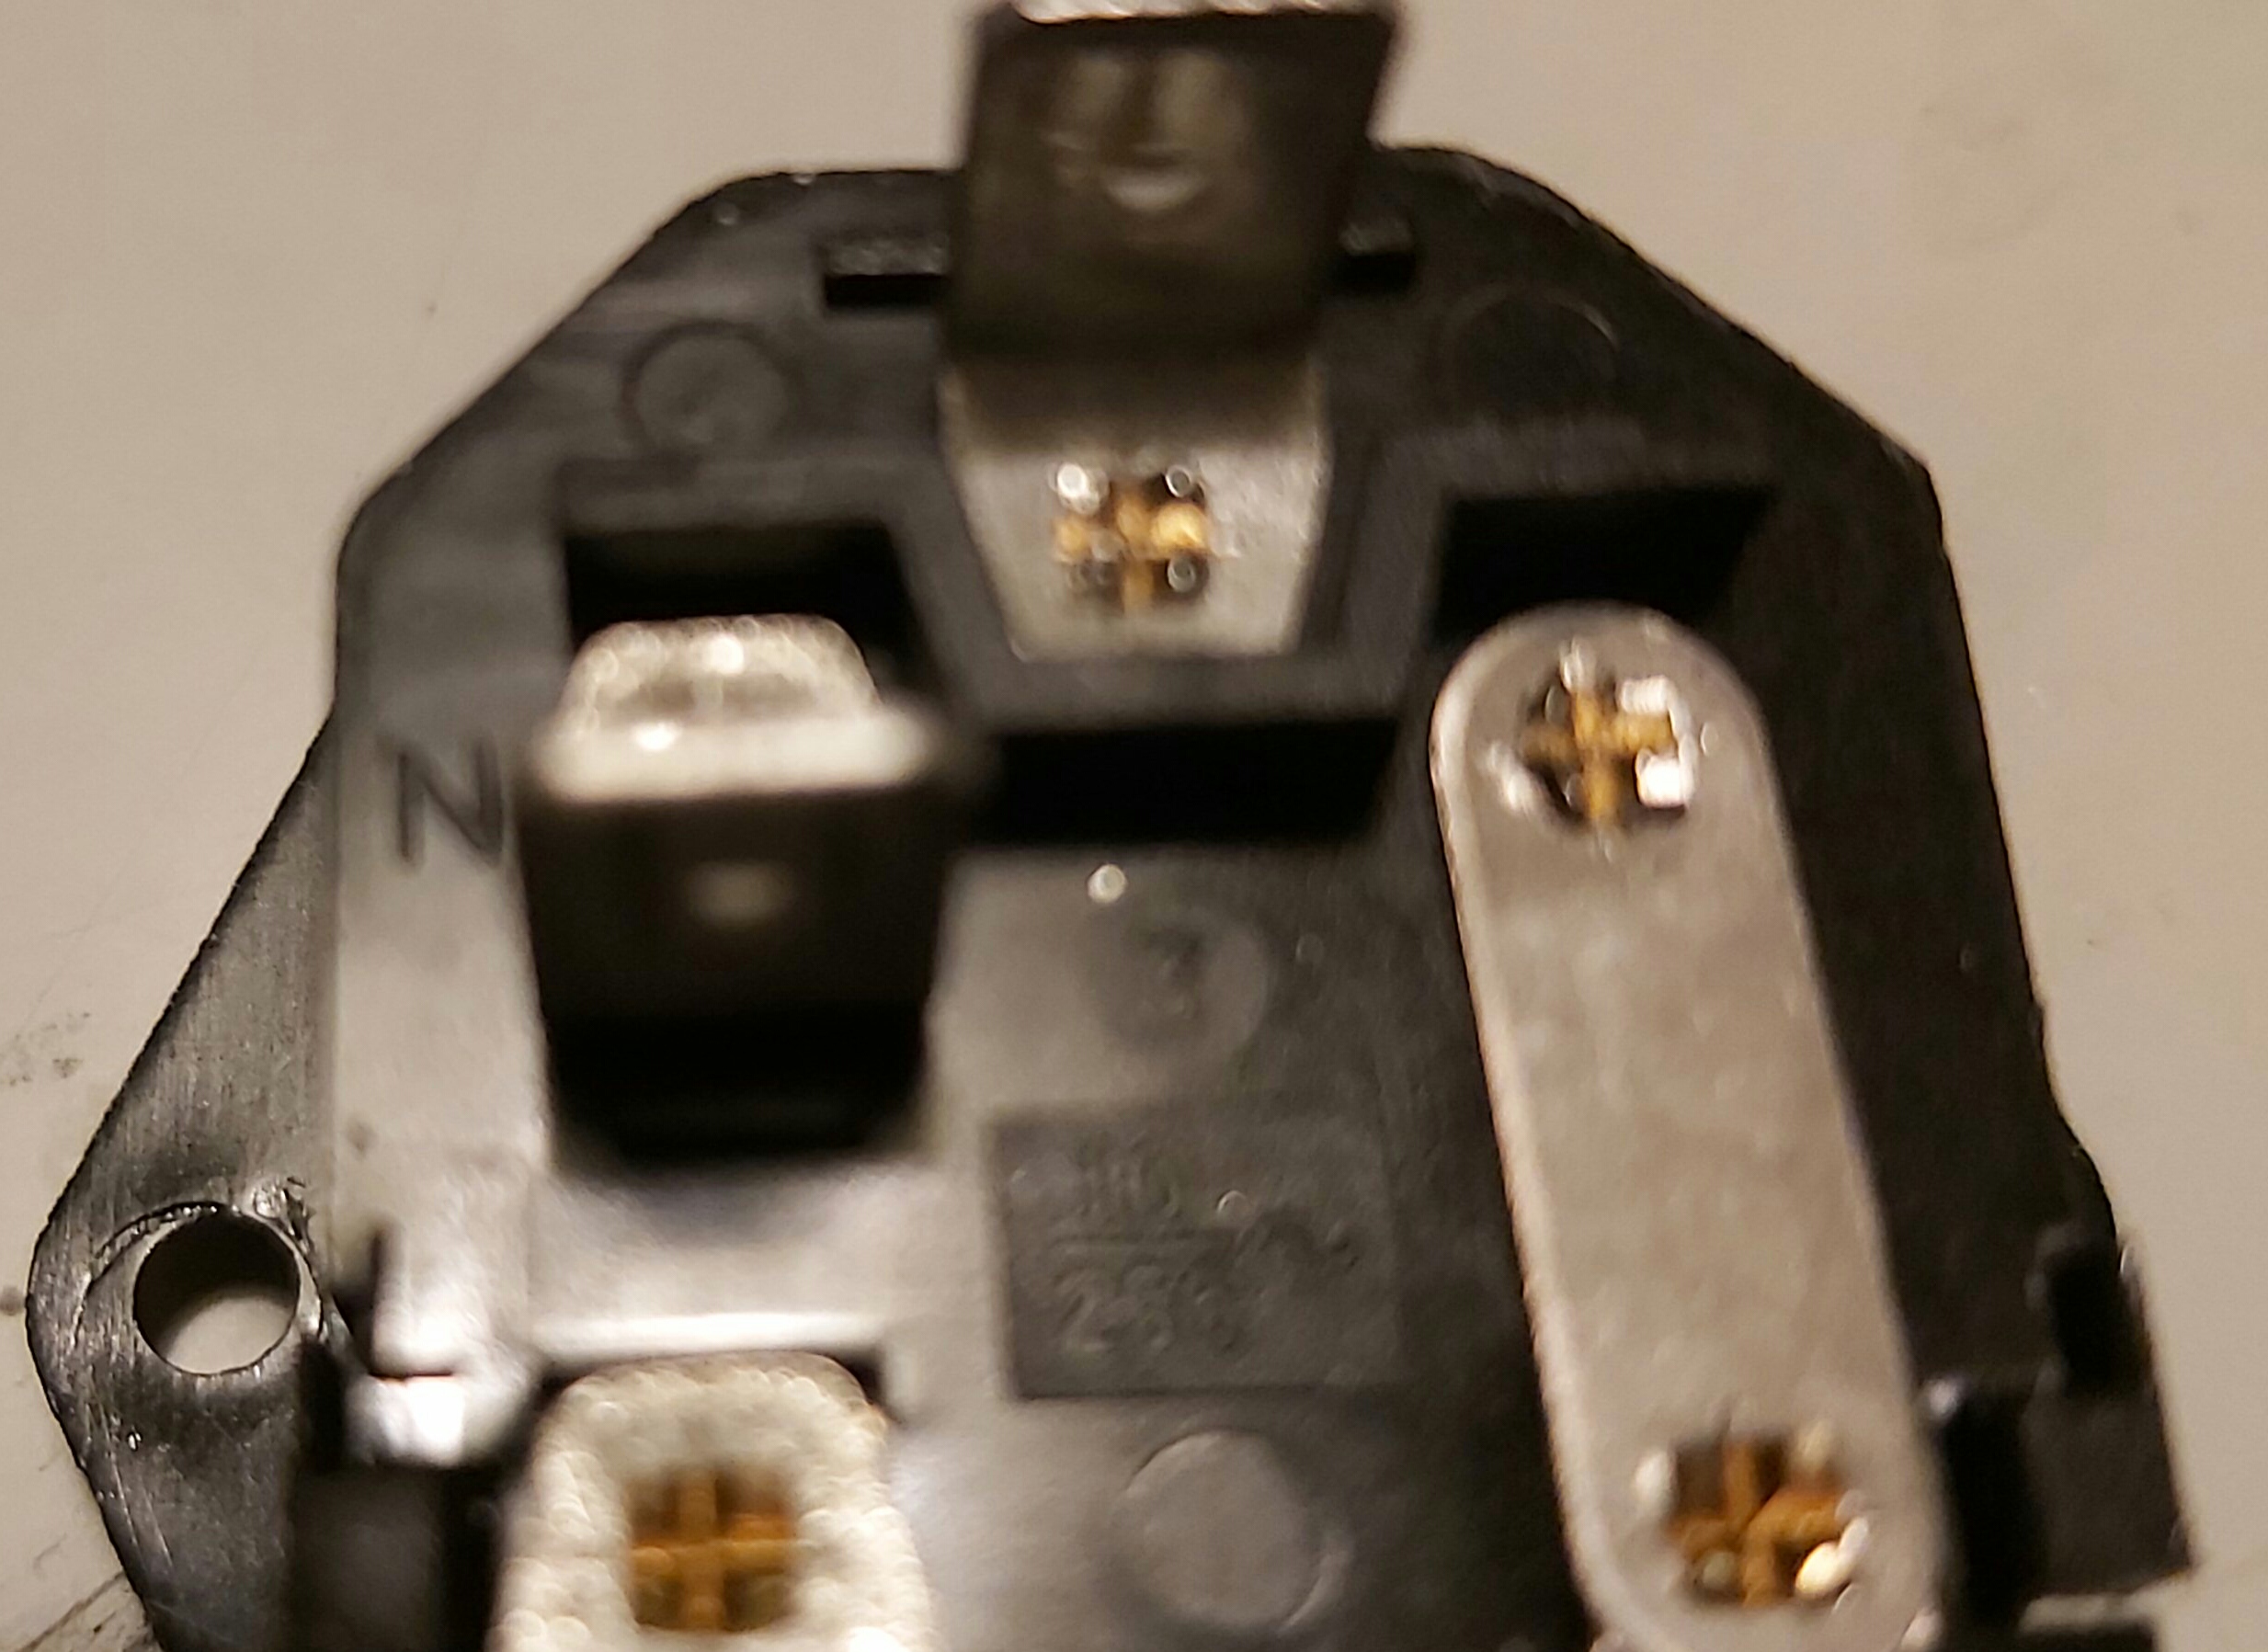
10A fuse in power plug socket is not burned but when Simucbe board is off and i turn powering PSU same happens again. and also power switch snaps off from device what i have installed.
I cant really understand what was wrong in connection as everything is as it should be
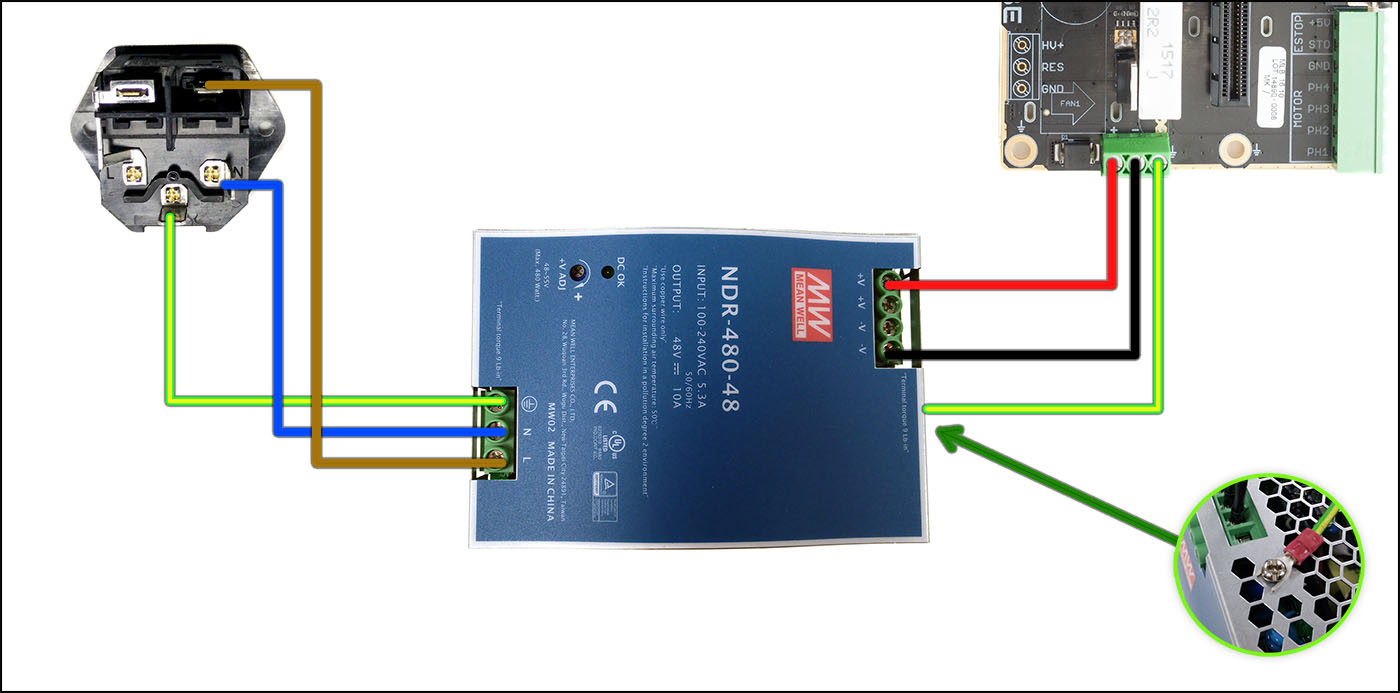
And L went via ON/OFF switch into PSU L and neutral (N) went straight into PSU N and ground (market with ground) went straight into PSU ground.
I just cant understand what has caused blowup of that PSU. It is definately now toasted as i now last time tried powering it and heard bang and saw buff of smoke coming and there is clearly something burned inside PSU.
I had Simucube cards ofcourse taken now off) and i had just PSU, power socket and on/off switch in table
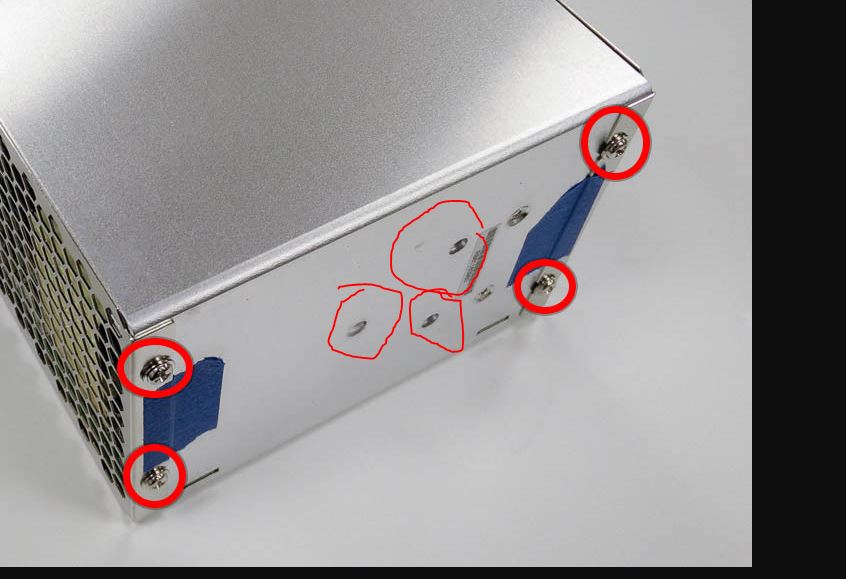
Only thing what i can think of is that i screw PSU to computer case using those 3 screw holes where DIN rail attachment goes. I tried to check if it is possible that screws could have touched something inside PSU and caused shortcut but if i look inside PSU i can see that there are some kind of foams in PSU against those holes and no PCB or any components. i will wait few days and open PSU trying to see inside.
I suppose i need to order new PSU (sighs) as i do not want to stop project now.
Ok i took PSU cover off and there is foam and then there is it looks like transistor inside that foam. So i probably grounded that transistor with screw what i used. Expensive screw, at least 100 euros.
Ok with help of Mika “Muscle” Takala i tried with different PSU (24A/20A/480W) and board seems to show lights etc.
I try to check if PC detects it . I can say that i toasted just on my own that PSU using screws which seemed to cost about 100 euros (I hope not more :D)
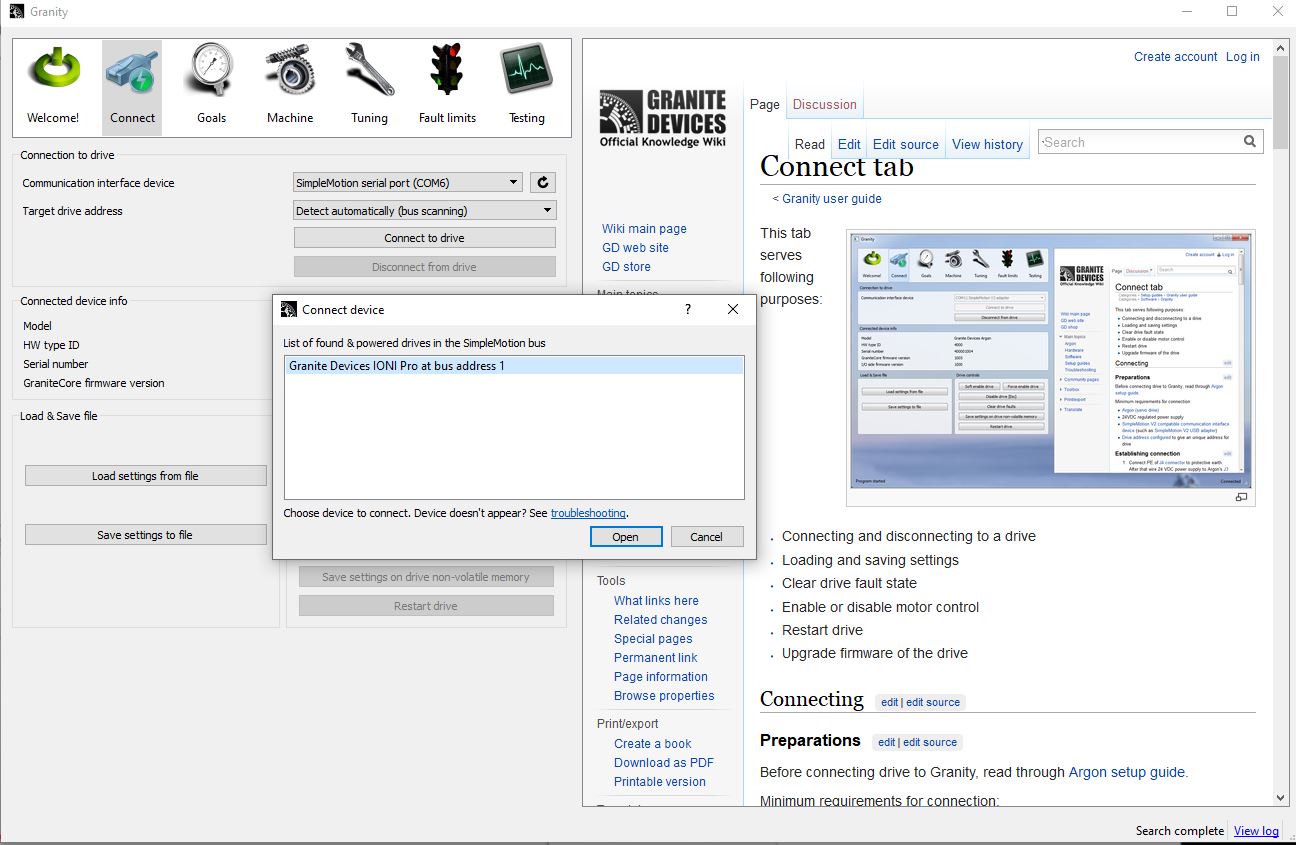
Hmm i could firmware update that Ioni Board cut i cant get Simucube card visibile in device list so that i could run with DfuseDemo.
Seems like that is not appearing to USB device list as STM32 Bootloader.
If i read Firmware WIKI
I have in my board S1 switch so that i “nipple” is ON side and there is small white plastic visible on side where is number 1. Should i move nipple to side where number 1 is?
The factory firmware on Simucube 1 puts the device into DFU mode, no dip switch setup needed. If there is any STM32 DFU MODE or Bootloader visible in Device Manager, you might need to update its driver with the one that is supplied with DfuSeDemo.
Yes i could get STM32 DFU mode or something similar visible in my work laptop. I try to do installation with that.
I used different PC and i could upload 1.022 firmware to card. Seems it is still not showing in Gaming PC so back to older PC to try to connect motor and update Biss C encoder.


 Something is not correct in PSU. First time when i powered system it shut down electricity. Fault circuit protection witch in electricity cabinet and i you could also heard small noise from PSU.
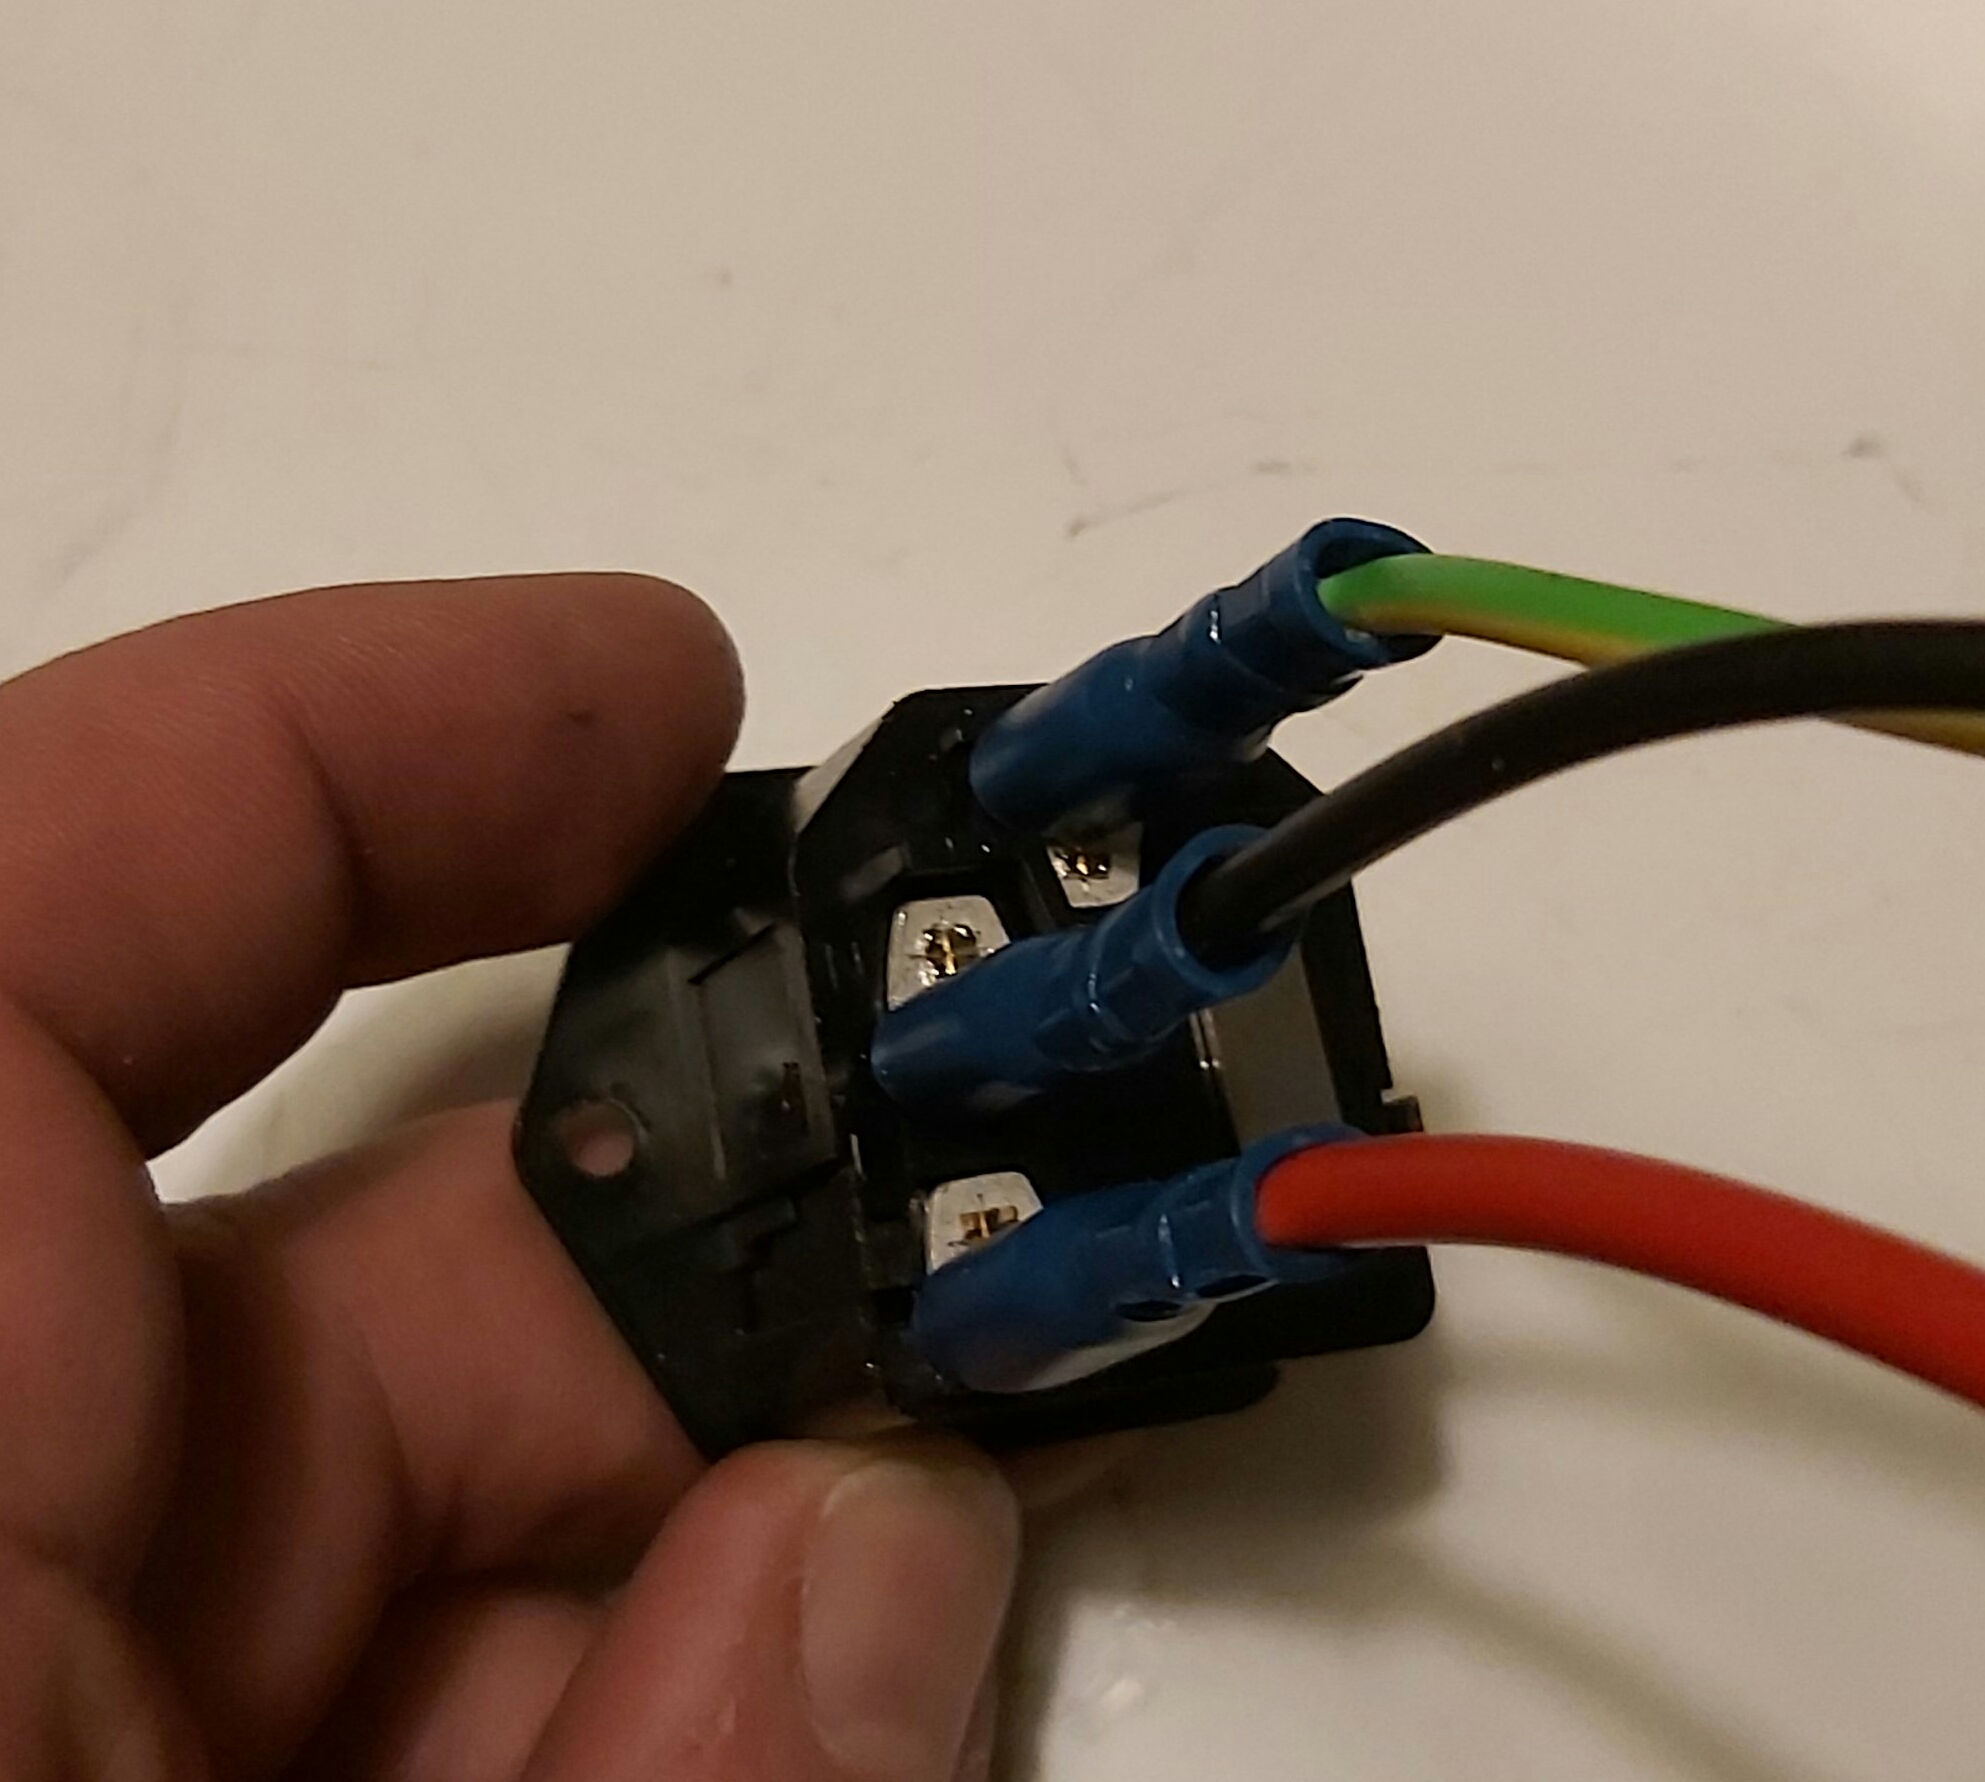
